How to Optimize Windows Without Third-Party Apps: A Step-by-Step Guide
Introduction
If you've ever used a Windows PC, you've likely been tempted by optimization apps that promise to speed up your computer by deleting temporary files, cleaning the registry, and performing other magical tasks. In reality, these apps often deliver minimal improvements and can even cause harm. The good news is that Windows comes with powerful built-in tools that can handle most optimization tasks safely and effectively. This guide will walk you through seven simple steps to optimize your system using only native features—no third-party software required.
What You Need
- A Windows 10 or Windows 11 computer
- Administrator access (for certain tools)
- Patience and about 30 minutes
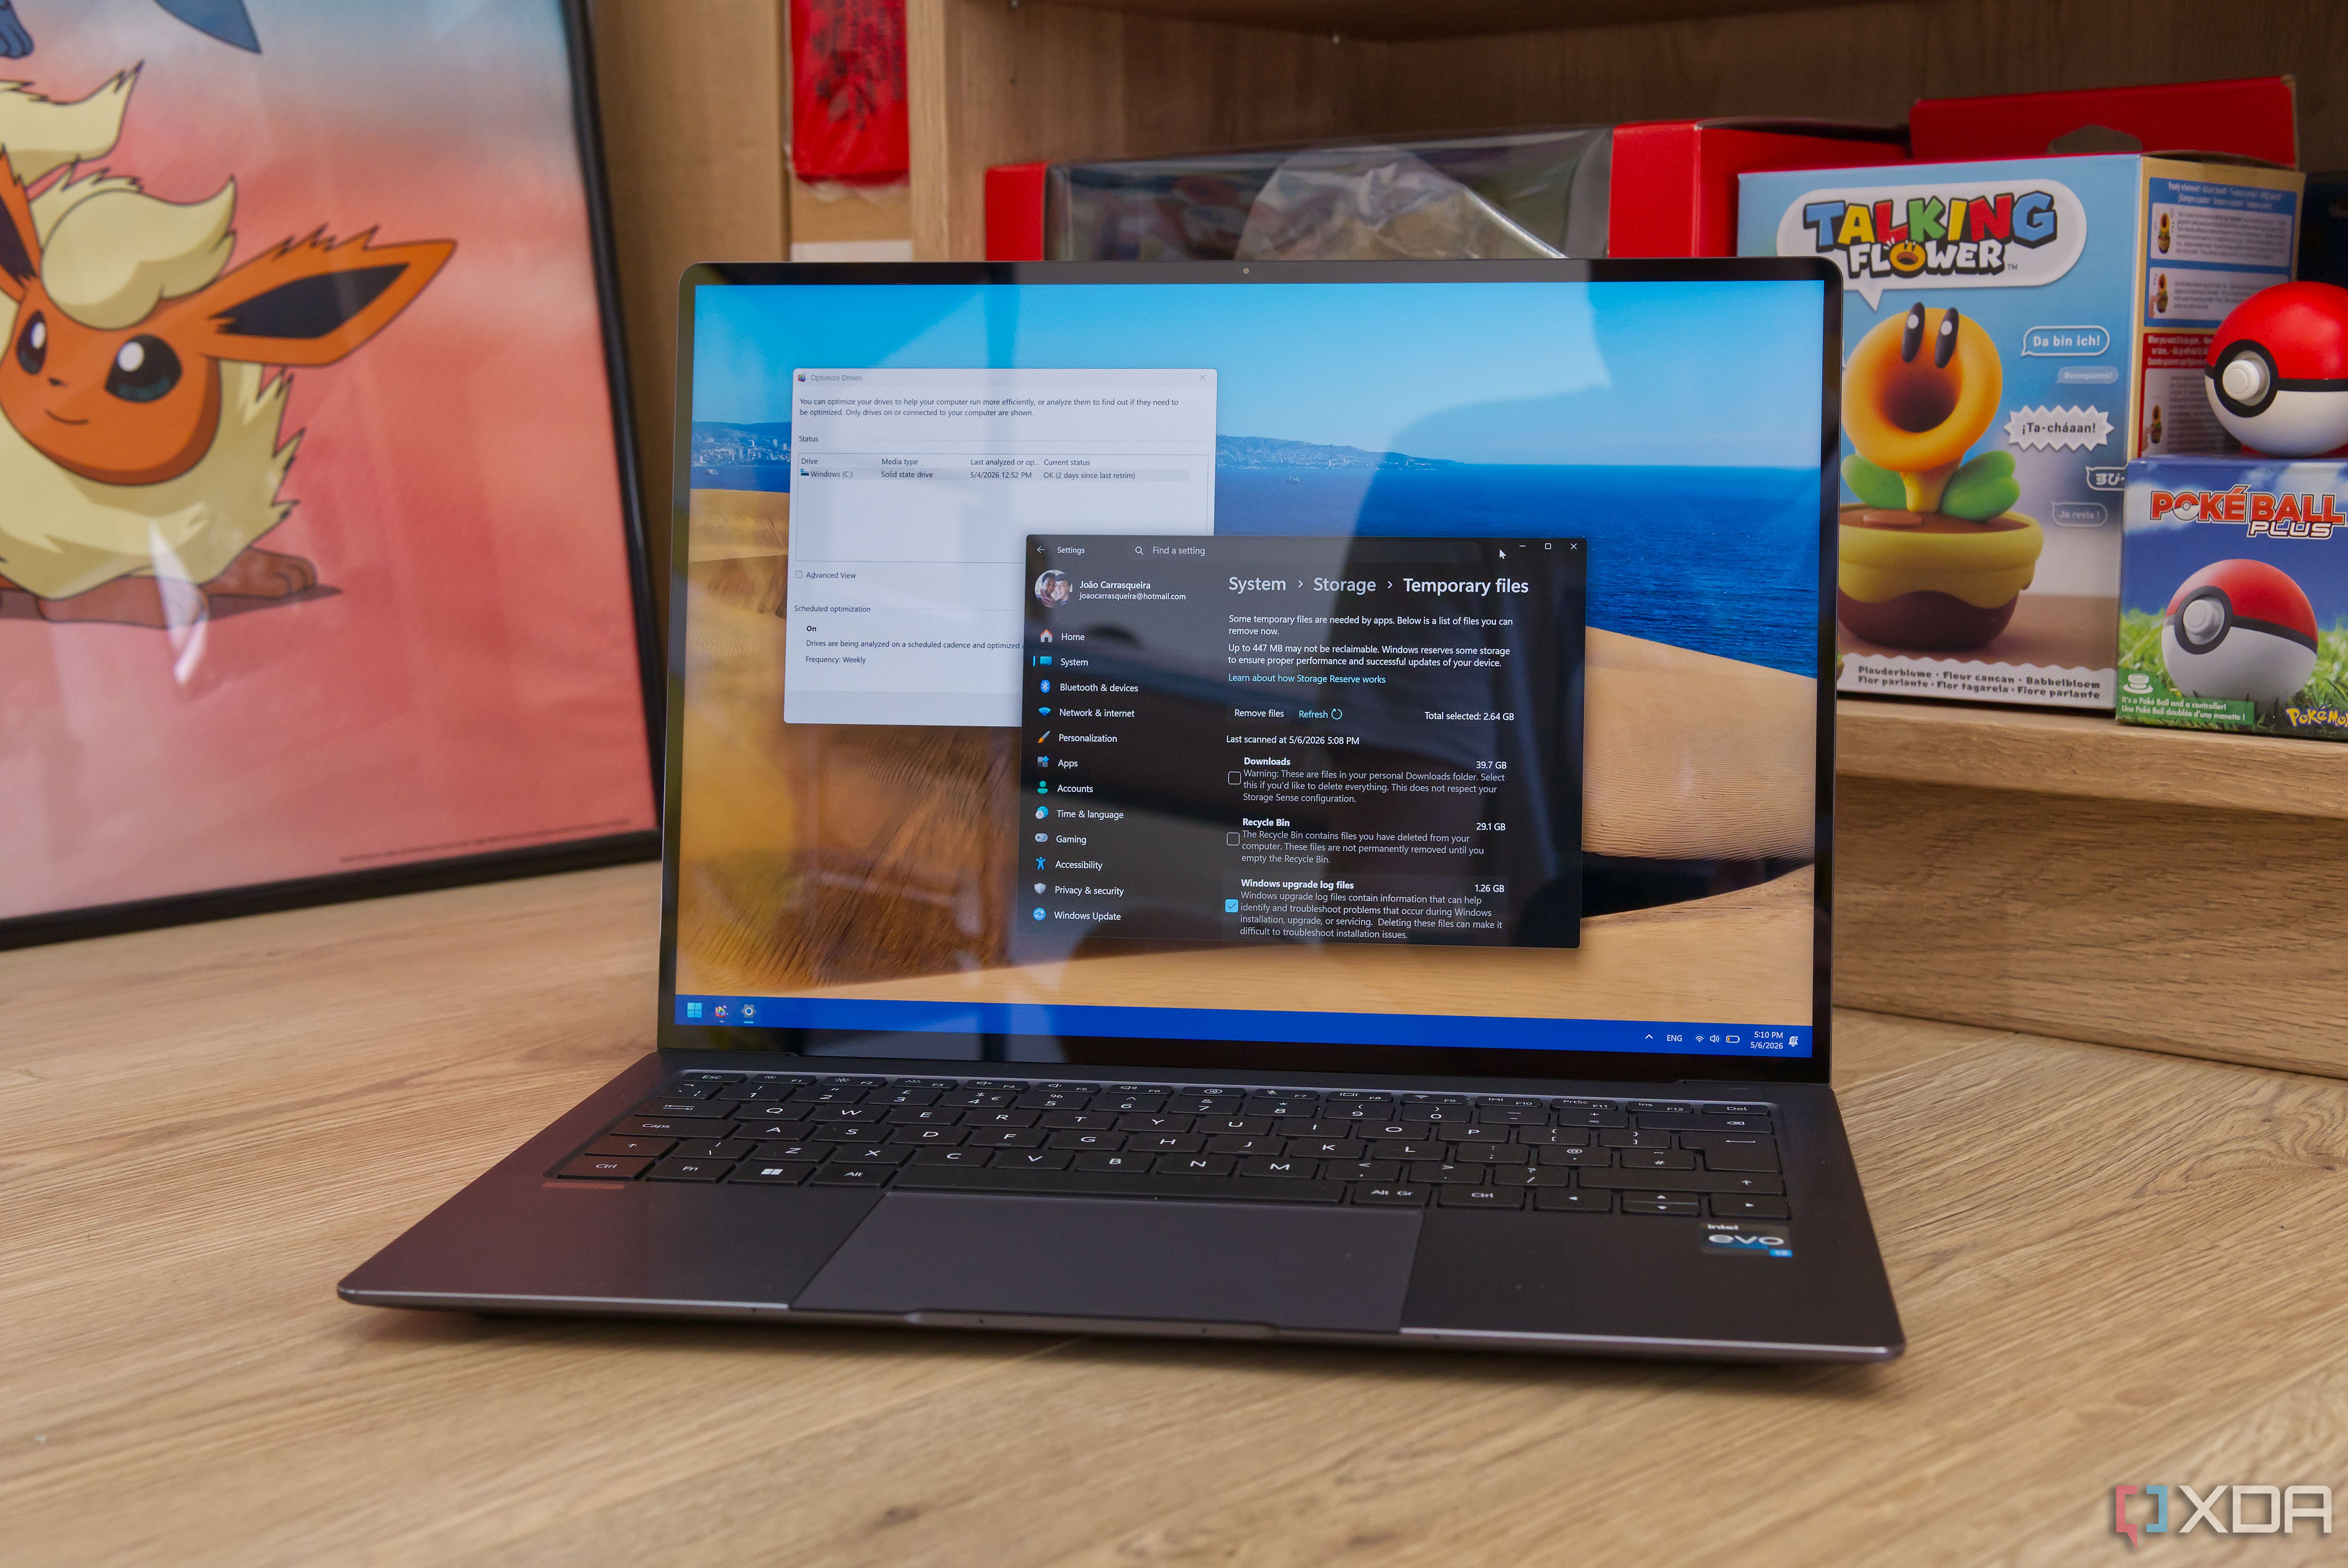
Step 1: Activate and Configure Storage Sense
Storage Sense is Windows' automatic cleanup tool. It deletes temporary files, empties the recycle bin, and removes old versions of Windows updates. To enable it:
- Open Settings (Windows + I).
- Go to System > Storage.
- Toggle Storage Sense on.
- Click Configure Storage Sense or run it now to customize when it runs (e.g., daily, weekly) and what it deletes.
Once configured, Storage Sense works silently in the background, keeping your drive clean without any manual effort.
Step 2: Run Disk Cleanup Manually
For a deeper clean, use the classic Disk Cleanup tool. It targets system files, temporary internet files, and more.
- Type Disk Cleanup in the Start menu and open it.
- Select the drive you want to clean (usually C:).
- Click Clean up system files to include Windows update leftovers and other protected files.
- Check the boxes for the file types you want to delete (e.g., Temporary files, Recycle Bin, Delivery Optimization Files).
- Click OK and confirm.
This step can reclaim several gigabytes of space and improve system responsiveness.
Step 3: Manage Startup Programs
Too many programs launching at startup slows down boot time. Use Task Manager to disable unnecessary ones.
- Press Ctrl + Shift + Esc to open Task Manager.
- Go to the Startup tab.
- Review the list of programs. Right-click any that you don't need at startup (e.g., updaters, chat apps) and select Disable.
Be careful: only disable programs you recognize. Windows itself and security software should remain enabled.
Step 4: Monitor and Diagnose Performance with Task Manager
The Task Manager also serves as a real-time performance monitor. It helps you identify resource hogs.
- Open Task Manager (Ctrl + Shift + Esc).
- Click More details if you see a simple view.
- Use the tabs Processes, Performance, and App history to see CPU, memory, disk, and network usage.
- If a specific process uses high resources, right-click it and choose End task to shut it down (only if you know it's safe).
Regular monitoring helps you spot issues before they slow your system down.
Step 5: Adjust Visual Effects for Performance
Windows' fancy animations and transparency effects can consume resources. You can disable them for a snappier experience.
- Type Performance in the Start menu and open Adjust the appearance and performance of Windows.
- Under Visual Effects, select Adjust for best performance to disable all animations, or choose Custom to keep a few.
- Click Apply and OK.
This change is immediate and can make older PCs feel noticeably faster.
Step 6: Use Windows Security for Malware Protection
Many optimization apps claim to find threats, but Windows Security (formerly Windows Defender) does the job for free and without bloat.
- Open Windows Security from the Start menu.
- Click Virus & threat protection.
- Under Current threats, click Scan options and select Full scan (or Microsoft Defender Antivirus (Offline scan) for stubborn malware).
- Let the scan run; it may take an hour. Remove any threats found.
Keeping Windows Security updated ensures your PC stays protected without third-party antivirus.
Step 7: Perform a System Restore or Reset (When Necessary)
If your system is still slow after all these steps, you can revert to a previous state or reset Windows entirely.
- System Restore rolls back system files and settings without affecting personal files. Type Create a restore point in the Start menu, then click System Restore and follow the wizard.
- Reset this PC reinstalls Windows while optionally keeping your files. Go to Settings > Update & Security > Recovery (Windows 10) or Settings > System > Recovery (Windows 11) and choose Get started under Reset this PC.
These options are a last resort but can restore sanity to a sluggish computer.
Tips and Warnings
- Avoid registry cleaners. Windows has no built-in registry cleanup tool because it's rarely needed. Third-party cleaners can delete essential entries and cause crashes.
- Don't trust false claims. Optimization apps often show inflated improvements. The built-in tools above deliver genuine, measurable benefits.
- Back up your files before any major cleanup or system change. Use File History or a manual backup.
- Be selective with startup programs. Only disable programs you don't use regularly. Essential services should stay.
- Run Disk Cleanup monthly and allow Storage Sense to run automatically. Regular maintenance prevents bloat.
- Update Windows regularly via Windows Update. Updates often include performance fixes and new optimizations.
By following these steps, you can keep your Windows PC running smoothly without ever installing a third-party optimization app. Your system will thank you with better speed, stability, and security.
Related Discussions